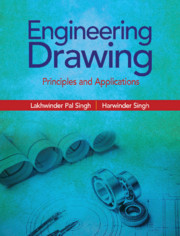
Engineering Drawing
This student friendly and self-explanatory textbook attempts to help readers, engineering students in India, grasp the basic concepts of engineering drawing clearly and easily. Care has been taken to include topics that mesh well with the syllabi of most universities, colleges and polytechnic institutes in India. Important topics, such as projection of solids, auxiliary projections, section of solids, isometric projections, orthographic projections and projection of planes, have been discussed comprehensively. Heavy emphasis has also been put on the actual figures described in the text, both from the first angle and third angle projection methods. A chapter on computer graphics further integrates these concepts with modern manual computer aided design. Finally, hundreds of solved examples, practice problems and objective-type questions with answers have been added to ensure the learning objectives of each chapter have been achieved.
- Covers the fundamental concepts of manual computer aided drafting
- Chapter on Computer Graphics explains the making of figures using AutoCAD
- Rich pedagogy includes more than 400 solved examples and 275 practice exercises with 250 objective type questions with answers
Product details
March 2021Adobe eBook Reader
9781009032292
0 pages
This ISBN is for an eBook version which is distributed on our behalf by a third party.
Table of Contents
- Preface
- Chapter 1: Drawing Instruments
- 1.1 Introduction
- 1.2 List of Draughting Tools
- 1.3 Drawing Board
- 1.4 Mini-Draughter
- 1.5 Small Instrument Box
- 1.6 Set Squares
- 1.7 Set of Scales
- 1.8 Protractor
- 1.9 French Curves
- 1.10 Drawing Sheets
- 1.11 Drawing Pencils
- 1.12 Paper Fasteners
- 1.13 Sand Paper Pad
- 1.14
- Eraser
- 1.15 Duster
- Exercises
- Objective Questions
- Answers
- Chapter 2: Lines, Lettering and Layout of Sheet
- 2.1 Introduction
- 2.2 Lines
- 2.3 Lettering
- 2.4 Single Stroke Letters
- 2.5 Gothic Letters
- 2.6 General Proportions of Letters
- 2.7 Drawing Sheet Layout
- 2.8 Title Block
- Exercises
- Objective Questions
- Answers
- Chapter 3: Principles of Dimensioning
- 3.1 Introduction
- 3.2 Types of Dimensions
- 3.3 Elements of Dimensioning
- 3.4 Execution of Dimensions
- 3.5 Placing of Dimensions
- 3.6 Methods of Dimensioning
- 3.7 Principles of Dimensioning
- Exercises
- Objective Questions
- Answers
- Chapter 4: Sections and Conventions
- 4.1 Introduction
- 4.2 Cutting Plane or Sectional Plane
- 4.3 Section Lines or Hatching Lines
- 4.4 Types of Section
- 4.5 Conventions for Various Materials
- 4.6 Conventional Breaks
- 4.7 Conventional Representation of Common Features
- Exercises
- Objective Questions
- Answers
- Chapter 5: Geometrical Constructions
- 5.1 Introduction
- 5.2 Bisection of a Straight Line
- 5.3 Dividing a Line Into Equal Parts
- 5.4 Draw a Line Parallel to a Given Straight Line
- 5.5 Bisect an Angle
- 5.6 Find the Centre of an Arc
- 5.7 Constructing an Equilateral Triangle
- 5.8 Construct Squares
- 5.9 Construct a Regular Polygons
- 5.10 To Draw Tangents
- 5.11 Inscribed Circles
- Exercises
- Objective Questions
- Answers
- Chapter 6: Scales
- 6.1 Introduction
- 6.2 Representative Fraction or Scale Factor
- 6.3 Scales on Drawings
- 6.4 Types of Scales
- 6.5 Plain Scales
- 6.6 Diagonal Scales
- Exercises
- Objective Questions
- Answers
- Chapter 7: Orthographic Projections
- 7.1 Introduction
- 7.2 Methods of Projections
- 7.2.1 Perspective Projection
- 7.2.2 Parallel Projection
- 7.3 Planes of Projection
- 7.4 Four Quadrants
- 7.5 First-Angle Projection
- 7.6 Third-Angle Projection
- 7.7 Symbols Used for First-Angle Projection and Third-Angle Projection Methods
- Exercises
- Objective Questions
- Answers
- Chapter 8 Projections of Points:
- 8.1 Introduction
- 8.2 Projection of a Point Lying in the First Quadrant
- 8.3 Projection of a Point Lying in the Second Quadrant
- 8.4 Projection of a Point Lying in the Third Quadrant
- 8.5 Projection of Point Lying in the Fourth Quadrant
- 8.6 Special Cases
- 8.7 A Point is Situated in the Three Planes of Projection
- Exercises
- Objective Questions
- Answers
- Chapter 9: Projections of Lines
- 9.1 Introduction
- 9.2 Position of a Straight Line
- 9.3 Line Parallel to Both HP and VP
- 9.4 Line Inclined to One Plane and Parallel to the Other
- 9.5 Line Perpendicular to One of the Planes
- 9.6 Line Contained by One or Both of the Principal Planes
- 9.7 Line Inclined to Both HP And VP
- 9.8 Line Contained by a Profile Plane (PP) or Line Contained by a Plane, Perpendicular to Both HP and VP
- 9.9 Traces of a Line
- Exercises
- Objective Questions
- Answers
- Chapter 10: Projections of Planes
- 10.1 Introduction
- 10.2 Types of Planes
- 10.3 Traces of Planes
- 10.4 A Secondary Plane in Different Positions with Respect to the Principal Planes
- 10.5 Projections of Plane Parallel to One of the Principal Planes
- 10.6 Projections of Plane Perpendicular to Both HP and VP
- 10.7 Projections of Plane Inclined to One of the Principal Planes and Perpendicular to the other Plane
- 10.8 Projections of Plane Inclined to Both the Principal Planes
- Exercises
- Objective Questions
- Answers
- Chapter 11: Auxiliary Projections
- 11.1 Introduction
- 11.2 Types of Auxiliary Planes and Views
- 11.3 Projections of Points
- 11.4 Projections of Straight Lines
- 11.5 Projections of Planes
- 11.6 Shortest Distance between two Skew Lines
- Additional Problems
- Exercises
- Objective Questions


